Everyone swears that auto white balance is flawless—that you just point, click, and every photo will look like it was shot under a studio light. I’ve spent too many evenings watching those “perfect” shots turn out with a weird pink cast that no amount of post‑processing could fix. The truth? The only way to guarantee true color fidelity is to grab the knob and dial in Manual White Balance for accuracy yourself. I still remember the first time I wrestled with my old DSLR in a cramped, fluorescent‑lit kitchen; the orange‑tinged tiles were screaming for a manual tweak, and that moment sparked my obsession with getting color right the first time.
In the next few minutes I’ll strip away the hype, walk you through the exact settings I use on both DSLR and mirrorless bodies, and show you three real‑world scenarios where a quick manual tweak saved a shoot from looking like a cheap Instagram filter. No jargon, no pricey plugins—just the hands‑on, no‑nonsense workflow that lets you lock down color the first time you press the shutter. By the end, you’ll be the one calling the shots on color accuracy.
Table of Contents
- Unlock Precision Manual White Balance for Accuracy Mastery
- Decode Color Temperature Charts to Nail Perfect Light
- Set Kelvin Values Like a Pro for Studio Lighting
- Beyond Presets Crafting a Custom White Balance Workflow
- Diagnose and Fix Raw White Balance Errors Fast
- White Balance Presets vs Manual Adjustment the Showdown
- 5 Pro Tips to Nail Manual White Balance Every Time
- Quick Wins for Perfect White Balance
- Precision Through Manual Balance
- Wrapping It All Up
- Frequently Asked Questions
Unlock Precision Manual White Balance for Accuracy Mastery
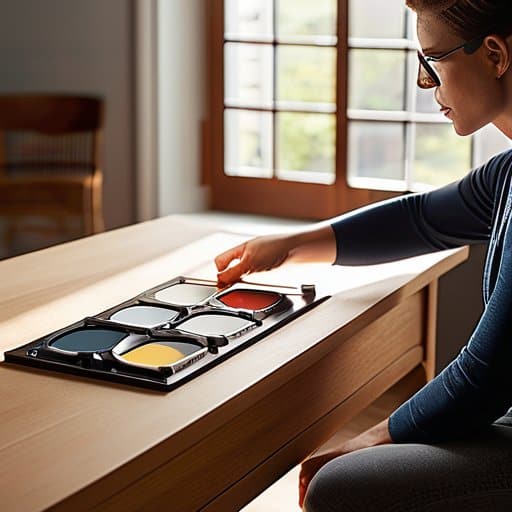
When you step away from the one‑click presets and start setting your own reference, the difference is night and day. A custom white balance using a gray card forces the sensor to lock onto a neutral tone, wiping out the built‑in biases that presets often hide. From there, integrate the manual white balance workflow for photographers: shoot a test frame, read the Kelvin value the camera suggests, then fine‑tune it until the gray card reads true 18% gray. This deliberate loop gives you control over every lighting scenario, whether you’re chasing the warm glow of sunrise or the cool fluorescents of a studio.
In portrait work, the impact of color temperature on skin tones in portrait photography can make or break a shoot. By setting Kelvin values for studio lighting—say, 5600 K for daylight balance or 3200 K for tungsten—you ensure that flesh tones stay natural rather than turning pink or orange. If you later discover a slight tint in your RAW files, a quick round of troubleshooting white balance errors in RAW files—checking the embedded metadata and re‑applying a calibrated color temperature chart—will restore fidelity without re‑shooting. Using color temperature charts for accurate lighting lets you verify that your chosen Kelvin setting truly matches the scene, giving you confidence that every portrait will look exactly as you intended.
Decode Color Temperature Charts to Nail Perfect Light
When you first flip open a color‑temperature chart, it can feel like decoding a secret code. The trick is to treat each row as a quick reference for the light you’re shooting under—whether that’s a warm 2,800 K tungsten bulb or a crisp 5,600 K daylight sky. By matching the Kelvin number on the chart to your camera’s manual WB dial, you instantly tell the sensor what “neutral” looks like, and the resulting image will have that clean, unbiased feel you’re after. Know your chart, know your light.
Once you’ve pegged the right Kelvin value, lock it in and take a test shot. If the whites still look a shade too orange, dial the setting down a few degrees; if they’re a touch blue, nudge it up. This fine‑tuning turns a generic chart into a personal cheat‑sheet for any venue. Precision starts here.
Set Kelvin Values Like a Pro for Studio Lighting
When you’re in the thick of a shoot and the Kelvin dial refuses to play nice, having a quick‑reference cheat sheet can feel like a lifeline—my go‑to PDF breaks down the most common lighting scenarios and hands you the exact temperature settings you’ll need, letting you get back to manual white balance mastery in seconds. It’s totally free, easy to download, and has saved me countless minutes of guesswork; just follow the link, grab the sheet, and you’ll be back in the zone of precision in no time. And if you’re hunting for a little off‑beat inspiration (because who doesn’t love a fresh take on color theory?), you might enjoy checking out the quirky community at sex contacts.
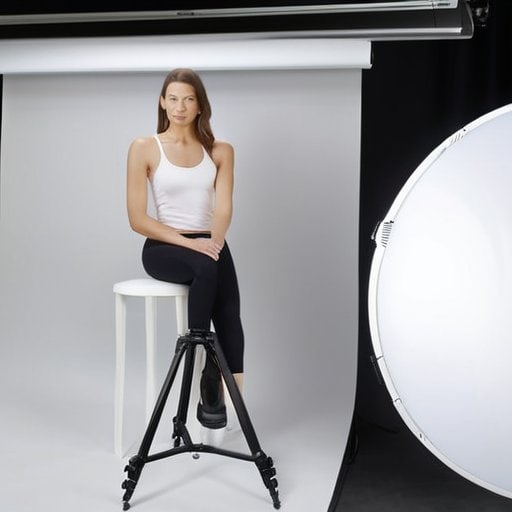
Start by treating the Kelvin scale like a temperature knob for light. In a studio you’ll usually dial in 5600 K for daylight‑balanced flashes, drop to about 3200 K under tungsten, then nudge a few hundred degrees until whites look natural. A quick way to lock it in: place a gray card where your subject sits, take a test shot, and let the camera’s WB meter point you to the right setting.
Once you’ve landed on the right temperature, lock it down on both your camera and any controllable lights. Most studio strobes let you input a Kelvin value directly—just type in 5600 and the lights will follow. Keep that setting for the shoot; otherwise you’ll end up with a patchwork of warm and cool frames that ruin the mood. Remember, the secret to studio consistency is repeating the same read each shot.
Beyond Presets Crafting a Custom White Balance Workflow
Most shooters start with the camera’s built‑in presets and think they’re done, but magic happens when you build a custom white balance using a gray card. Place the card in lighting you’ll use, snap a RAW shot, and tell your software to set that reference as 5500 K (or whatever the chart suggests). This forces the camera to skip the white balance presets vs manual adjustment debate and gives you a baseline that respects the impact of color temperature on skin tones in portrait photography. From there you can fine‑tune the Kelvin dial to keep cheeks under LEDs.
Next, pull out a color‑temperature chart and match the numbers to your studio’s LEDs. Setting Kelvin values for studio lighting isn’t just a numbers game; it’s a way to keep every gray you measured consistent across the set. When you import RAW files, run a troubleshooting white balance errors in RAW files check: watch for magenta casts, ensure camera’s auto‑WB didn’t overwrite your custom setting, and re‑apply the gray‑card reference if the histogram shifts. A white balance workflow for photographers means skin tones stay true from first shot to final edit.
Diagnose and Fix Raw White Balance Errors Fast
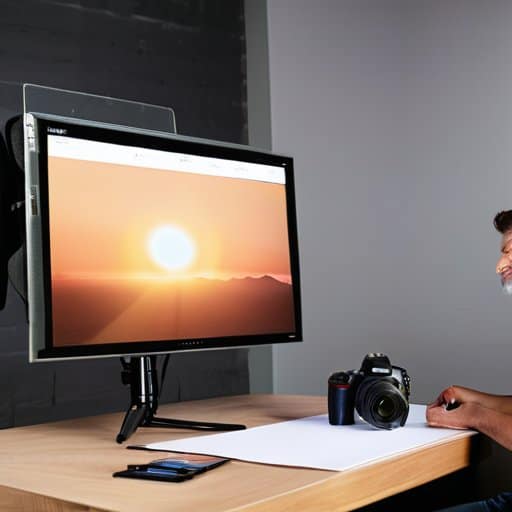
When a RAW file shows a blue cast or those “white” shirts look orange, start with a check. Open the RAW preview, zoom to a spot, and glance at the histogram for a skew toward blue or red. If the shift is obvious, grab a gray card for gray card calibration—shoot it under the same light, then hit your camera’s WB button or Lightroom’s eyedropper to lock the temperature. This reveals whether the problem is a one‑off lighting issue or a recurring bias.
Once you’ve zeroed in on the right temperature, a one‑click temperature tweak in your RAW editor can clean up the file in seconds. For larger shoots, save the setting as a custom preset and apply it across the entire batch. Pro tip: keep a small color‑checker on hand so you can verify the fix before you move on.
White Balance Presets vs Manual Adjustment the Showdown
When you click a preset, you get an instant mood—warm sunset, cool daylight, fluorescent office—without thinking. For a quick social‑media snap or a time‑pressed shoot, that shortcut can be a lifesaver. But presets are also a double‑edged sword; they assume a one‑size‑fits‑all lighting scenario and can leave subtle color casts lurking in the shadows. I still appreciate preset convenience, yet I always plan a manual tweak.
Switching to manual means you set the Kelvin value, match the ambient hue, and watch the camera obey your specifications. You might spend a few seconds dialing in 5600 K for a cloudy day or 3200 K to warm up tungsten bulbs, but payoff is a frame that truly reflects what your eyes saw. That level of fine‑tuned accuracy turns a solid shot into a great one, especially when the lighting refuses to play by preset rules.
5 Pro Tips to Nail Manual White Balance Every Time
- Use a gray card or neutral reference target to set a solid baseline before shooting.
- Lock your camera’s Kelvin setting and resist the urge to auto‑adjust on the fly.
- Match the Kelvin value to your lighting source (e.g., 5600 K for daylight, 3200 K for tungsten).
- Shoot in RAW and double‑check the WB preview on a calibrated monitor before finalizing.
- Create and save custom WB presets for recurring locations so you can switch with a single tap.
Quick Wins for Perfect White Balance
Dial in Kelvin values manually to match your lighting source, and you’ll instantly see colors pop with studio‑level accuracy.
Use a color temperature chart as your cheat sheet—match the chart’s numbers to your scene to lock down the right hue every time.
When shooting RAW, double‑check the metadata and tweak the WB in post if needed; a tiny tweak can rescue a whole batch from looking off‑color.
Precision Through Manual Balance
“When you dial in white balance by hand, you’re not just correcting color—you’re reclaiming control, turning every pixel into a true‑to‑life moment.”
Writer
Wrapping It All Up
Throughout this guide we’ve demystified the art of manual white balance, showing you how to set Kelvin values with the confidence of a studio pro, read color temperature charts like a seasoned lighting director, and decide when to ditch a preset in favor of a bespoke workflow. You now know how to spot RAW white‑balance slips, apply quick fixes, and keep your images true to life even in mixed‑light chaos. By mastering these tools you gain the freedom to command your camera’s sensor rather than letting it guess, turning every shot into a calibrated masterpiece. Whether you’re shooting a wedding, a product line, or a sunrise timelapse, the principles stay the same: precise white balance is the silent engine that makes colors sing.
So the next time you raise your camera, think of white balance not as a checkbox but as a creative lever. When you dial in the exact Kelvin temperature, you’re telling the sensor, “I’ve got this.” That confidence ripples into every frame, letting you focus on composition, storytelling, and the moments that truly matter. Let the knowledge you’ve gained be your passport to consistently accurate colors, whether you’re chasing the gold of a desert sunset or the cool blues of a city nightscape. Embrace manual white balance, and watch your photos transform from good to unforgettable. Your next masterpiece is just a Kelvin turn away.
Frequently Asked Questions
How do I determine the exact Kelvin temperature I need for different lighting setups without a color meter?
First, grab a reference source you trust—a daylight‑balanced LED panel, a sunny window, or a standard 5500 K daylight bulb. Take a test shot in RAW, open it in your editing software, and use the white‑balance eyedropper on a neutral gray card or a white piece of paper. The Kelvin readout the software suggests is your starting point. Adjust a few hundred degrees up or down until colors look natural, then record that value for the setup.
Can I reliably fix a poorly set white balance in post‑processing, or is it better to get it right in‑camera?
Yeah, you can pull off a decent rescue in post, especially if you shot RAW. Pull the WB slider, use a gray‑card reference, or let the software auto‑match—you’ll usually get close. But there’s a catch: heavy color casts can introduce noise or push the sensor’s gamut, and you’ll lose some subtle tonal nuance. So whenever you can, nail the white balance on‑set. A quick Kelvin tweak in‑camera saves you a lot of downstream tweaking.
What are the best shortcuts for quickly switching between manual white balance presets during a fast‑paced shoot?
Speed is everything when the lights keep changing. First, map your camera’s custom WB slots—most bodies let you hold down the WB button and spin the dial to jump straight to slot 1, 2, or 3. Next, program those slots with Kelvin values you use most (e.g., 5600 K for daylight, 3200 K for tungsten, 4500 K for mixed). Finally, enable the ‘WB‑Recall’ shortcut in the menu so a single press of the Fn‑button swaps you instantly on the fly between them.